

If you’ve created a login account on TemplarScreens.com, you have access to the Dealer Portal and a bunch of documents we keep behind that login. One of those documents might be useful to you and your sales team: the Retail Price Book!
To find it, login and click the “Dealer Dashboard” link. Under the list of documents, check out “4. Retail Price Book – 2023 (Excel)“. Download the file to your desktop and open it up!
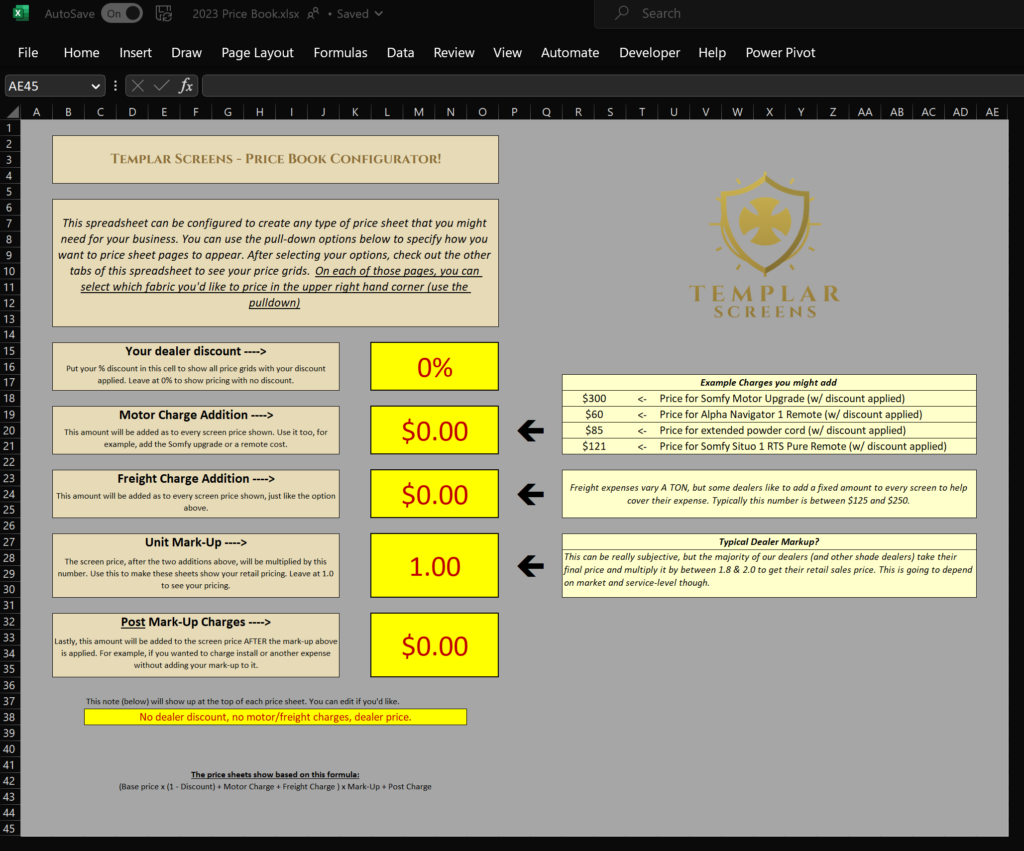
When you first open the Excel file, you’ll see the “Setup” tab that let’s you configure the document to your team’s specific use.
- Your Dealer Discount: Use this field to load your specific dealer discount percentage. If your discount is 15%, enter 15% here. You can leave this field at 0% if you don’t want your discount applied. This discount will be applied to all the screen unit costs shown on the grid tabs.
- Motor Charge Addition & Freight Charge Addition: Use these two fields to add a fixed charge to the screen price. You can add a charge for the Somfy motor upgrade, a remote or any other fixed cost that you’d like to apply. These two fields will be added to the screen cost shown on the grid tabs.
- Unit Mark-Up: Use this field to multiply the screen unit price (and the two charges above) by your standard margin. Most dealers use this mark-up to account for their install costs and profit margin. All the screen unit costs on the grid tabs will be multiplied by this number.
- Post Mark-Up Charges: Use this field to add an additional charge that is added AFTER the unit mark-up. For example, some dealers use a smaller markup factor (above), but add a fixed install charge. This number will be added to the screen unit costs shown on the grid tabs AFTER the unit mark-up is applied.
In summary, the price shown on the grid tabs is evaluated as:
(Base price x (1 – Discount) + Motor Charge + Freight Charge ) x Mark-Up + Post Charge
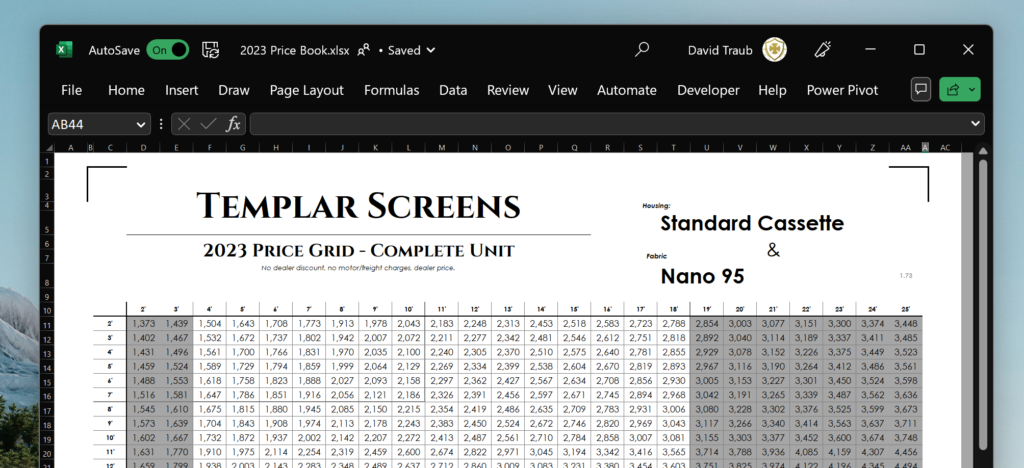
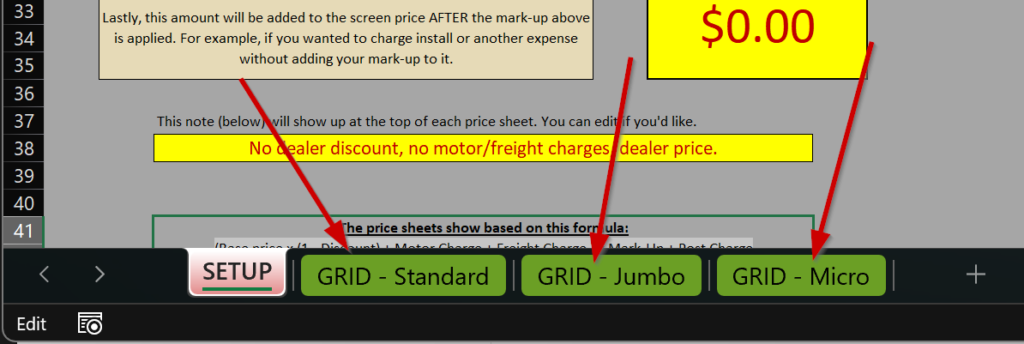
Once you’ve configured the “setup” tab how you’d like, click over to the other tabs to see your price grids. There is a separate tab for each housing size (Standard, Micro and Jumbo). Click on the size you’d like to see pricing for.
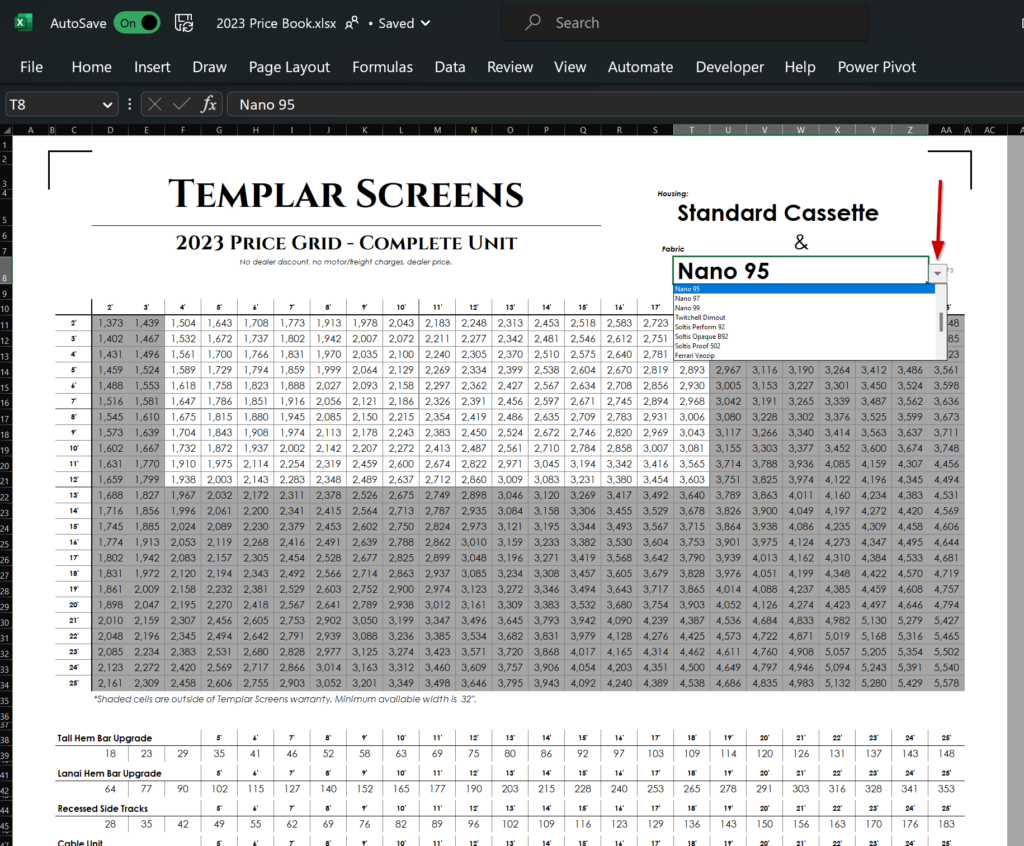
Once you’re on a price grid tab, you only have one more setting to deal with – the fabric!
In the top right of the tab, you’ll see “Nano 95” (our most popular fabric) already selected. If you’d like to see the price grid for other fabrics, just click the fabric name to see the pull-down arrow. Then click the pull-down arrow to see the full list of fabrics available. When you select a fabric, the grid will automatically update to the relevant pricing with all your set-up setting applied!
These tabs are pre-formatted to be ready to print. The unit pricing shown is comes with the Standard hem bar and surface tracks. Below the grid you’ll see the additional charge to upgrade to the Tall or Lanai hem bar or the Recessed tracks as well as common build-out prices and some common accessories.
If you have any questions at all – just shoot us a call and we can help you configure the spreadsheet however you’d like. Just by playing around with the set-up tab, you can create pages that will show your purchase cost, your team’s suggested retail price or even a distribution price if you have sub-dealers you work with.
As always, if there are any other tools you need to succeed, just let us know!